Wednesday, May 17, 2017

Running Xamarin.Forms application on an iPhone without using a Mac

By now, you should probably have heard of the latest news from Microsoft about the latest preview edition of Xamarin that allows you to test your Xamarin application on your iPhone without using a Mac. Note that this is only applicable for Xamarin.Forms application, not the Xamarin.iOS application, which still requires you to connect to a remote Mac in order to edit your Storyboard files. 

Getting the Preview Bits
First, you need to download Visual Studio 2017 Preview from https://www.visualstudio.com/vs/preview/

Once Visual Studio 2017 Preview is installed, install the Xamarin Updates Extension (https://developer.xamarin.com/recipes/cross-platform/ide/change_updates_channel/extension-gallery/).

Once this is done, let’s create a new Cross Platform App (Xamarin.Forms) and name it as HelloWorld:


Select the Blank App template and click OK.
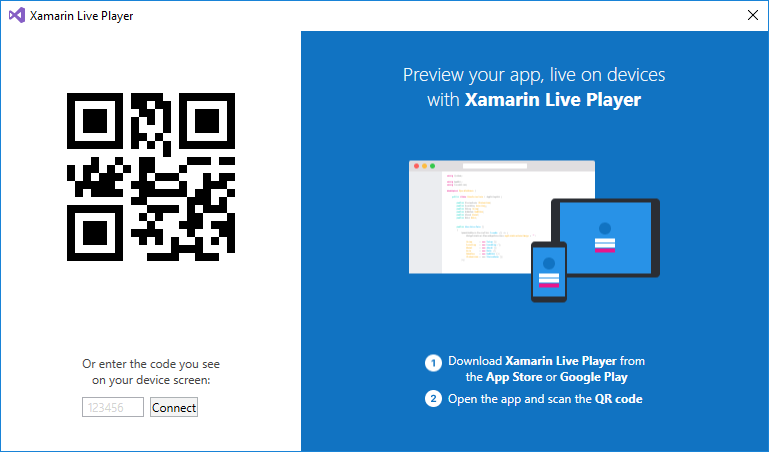
At the toolbar of Visual Studio 2017 Preview, click on the Live Player button:


You should now see a QR Code:


On your iPhone, download and install the Xamarin Live Player (https://itunes.apple.com/us/app/xamarin-live-player/id1228841832?ls=1&mt=8). Launch it and you should see the following:


Tap on the Pair to Visual Studio button and scan the QR code on your screen. It will now try to connect to Visual Studio:


Back in the original window that showed the QR code you will see the name of your iPhone connected:


When you ready to run the application on the iPhone, select the HelloWorld.iOS project in the toolbar of Visual Studio 2017. Click the Live Player button. At this moment, you will be asked to connect to a remote Mac. Ignore it. Instead, you should now see the name of your iPhone:


Click on the name of your iPhone and your application should now appear on your iPhone:

Tuesday, May 16, 2017

MOB105 - Learn iOS and Android programming without needing a Mac

With the Create React Native App (CRNA), you no longer need to use a Mac when you are learning how to program iOS apps. In addition, you also do not need to install Android Studio on your machine if you want to learn Android programming.

In this 2-day course, you will learn how to develop native iOS and Android apps using:

  • React Native
  • ECMAScript 2015 (ES6)

Best of all, you don't have to learn a new language (such as Objective-C, Java, or Swift) and your app is a pure native app. What's more, React Native supports live and hot reload (which saves you time during development phase) and dynamic app updates (without resubmitting your apps to AppStore or Google Play after it has been deployed).

MOB105 - Cross Platform Mobile Apps Development using React Native
Course Fee
S$1297 (nett; no GST)
If your company is sponsoring you for the training, your company can enjoy 400% tax deductions/ allowances and/or 40% cash payout for investment in innovation and productivity improvements under the Productivity and Innovation Credit (PIC) scheme. For more details, check out the Productivity and Innovation Credit page. 
Schedules
Start DateEnd DateCourse Outline and Application FormCategory
Tue May 30 2017Wed May 31 2017

Learn cross-platform mobile apps development using React Native
Mon Jun 12 2017 CONFIRMEDTue Jun 13 2017

Learn cross-platform mobile apps development using React Native
Wed Sep 20 2017Thu Sep 21 2017

Learn cross-platform mobile apps development using React Native
Venue
Hotel Grand Pacific Singapore
101 Victoria Street
Singapore 188018

Developing native iOS and Android apps without installing Xcode or Android Studio!

Want to learn iOS programming but don't have a Mac? Want to learn Android programming but facing a lot of difficulties in setting up the SDK? Well, you can now learn how to write cross-platform native apps using the new Create React Native App (CRNA), without needing to install Xcode or Android Studio! This means that you also don't need a Mac to learn iOS programming!

With CRNA, all you need to do is to install node and npm on your computer. Then, install the CRNA command line tools:

$ npm i -g create-react-native-app

To create a project named HelloWorld, use the following command:

$ create-react-native-app HelloWorld
$ cd HelloWorld

Once the project is created, the project folder will contain the following files:

  • App.js  
  • App.test.js 
  • README.md 
  • app.json 
  • node_modules 
  • package.json

You would develop the app just like a normal React Native app. When you are ready to test the app, simply use this command:

$ npm start

A barcode that is unique to your app will now be generated.

That's it! To view your app, download the Expo Client app on your iPhone or Android device. Scan the barcode unique to your project and voila, your app now runs on your iPhone or Android.

I think this is the coolest way to learn iOS and Android programming!

Monday, May 15, 2017

Using the crosstab() function in Pandas

If you are doing Data Science or Machine Learning in Python, chances are you will come cross a function named crosstbab() frequently.
So, what does it do? Let me explain that with an example.

From the documentation, the crosstab() function computes a simple cross-tabulation of two (or more) factors.

Consider the following example:

import pandas as pd
df = pd.DataFrame(
    {
        "Gender": ['Male','Male','Female','Female','Female'], 
        "Team" : [1,2,3,3,1]
    })
print(df)

The above code snippet will print out the following:

   Gender  Team
0    Male     1
1    Male     2
2  Female     3
3  Female     3
4  Female     1

Now, it would be useful to see the distribution of genders across the teams, and this is where the crosstab() function comes in:

print("Displaying the distribution of genders in each team")
print(pd.crosstab(df.Gender, df.Team))

The above code snippet will print out the following:

Displaying the distribution of genders in each team
Team    1  2  3
Gender         
Female  1  0  2
Male    1  1  0

Now you know!

Sunday, May 14, 2017

Dynamically Creating Your UI using React Native

When building mobile applications, you often need to dynamically create your UI. For example, you are creating a generic conference app and you need to load the tab bar items based on the number of days a conference has. In this case, you need to create the UI at runtime, rather than design time. So how do you do it in React Native? This post shows how it can be done.

Here I have an array simulating a list of sessions for each day:


var sessions = ['iOS', 'Android', 'Windows Phone', 'Tizen']

In the real world you probably will load this from a configuration file or from the Web.

Next, we will add tab bar items to our UI based on the sessions array:

  render() {
    return (
      
          
         {sessions.map((session, i) =>
           
             style={[styles.tabBarButton, this.getStyle({i}) ]} >
             {session}
           
         )}          
        
      
    );
  }

You can use the map() function to iterate through each item in the sessions array, and then add each tab bar buttons to the UI. The getStyle() function allows you to apply unique style for each tab bar item and is defined as follows:

  getStyle(index) { 
     //---index is a dictionary, e.g { i : 1 }         
     switch (index['i']) {

       //---return predefined styles
       case 0: return styles.button1;    
       case 1: return styles.button2;      
       case 2: return styles.button3;      
       
       //---return dynamic style
       case 3: return {backgroundColor: '#FCBF2E'};  
       case 4: return {backgroundColor: '#FC9626'};              
       default: return {backgroundColor: '#FCBF2E'};              
     }
  }

Here, I am demonstrating that the function can return either a predefined style, or you can dynamically create the style if you so desire. 

The styles used by my example are as follows:

     tabBar: {
    flexDirection:'row',   
    height: 50
  },
  tabBarButton: {
    flex: 1,   
    alignItems:'center',
    justifyContent:'center'
  },
  tabBarButtonText:{   
    fontWeight:'bold'   
  },
  button1: { backgroundColor: '#8BC051' },
  button2: { backgroundColor: '#CCD948' },

  button3: { backgroundColor: '#FDE84D' },

The figure below shows the UI with 4 tab bar items and 3 tab bar items (just remove the last item in the sessions variable).